The Chalk Series.

FullSizeRender-6

Materials:

  • Cabinet doors
  • Chalk paint
  • Hooks
  • Rope
  • Paint tape

I bought 2 cabinet doors at the Brimfield Antique Show and wasn’t quite sure what I was going to do with them but I knew that no matter what I did, it had to be cool.

The cracked paint and rusted hinges are literally to die for. I didn’t want to do anything to take away from that and just wanted to make sure that type of character was highlighted.

I decided to make these guys into chalk signs where I knew the chalk paint would still accentuate those cool cracks.

I measured (twice) and created small rectangles where I would apply the chalk paint. This is the first time I’ve worked with this kind of paint and I am OBSESSED! Without meaning to, I let the chalk paint bleed through the tape a bit so it’s not perfect. But if you haven’t figured it out by now, I love those little imperfections.

The chalk paint really made these pieces, so I really didn’t have to do much more. But to make things a bit more functional, I added some hooks. These hooks could be for anything from keys to hang in your foyer to mugs to hang in your kitchen. And then on one of the cabinets, I also added some rope for easy hanging.

With some pieces, it takes some elbow grease to really bring out the beauty. But these gems really already had that beauty in them, just needed a new eye.

Instagram: @novo_designsco

The Jackie.

“A knick-knack is a thing that sits on top of a what-not.” – Oliver Hardy

This ‘knick-knack holder’ was found at a flea market and wasn’t as shiny as it is now. In fact, it was a bit run down with a chippy paint and a faded white finish.

FullSizeRender-5

Materials:

  • Paint
  • Spray paint
  • Paint brushes
  • Sand paper
  • Painting tape

My friend, Jackie, and I decided to give our idle hands some purpose one Sunday evening. And what better way to do so than with a paint project!?

First we sanded the piece down just to make the wood a bit smoother and get rid of the littles bumps and bruises. Next comes paint!

My friend took many many art classes in college .. so I tasked her with blending the base color. She came up with this beautiful blue-ish turquoise by mixing blue and green and white acrylic paints. Once she was finished with this mastery, we both were psyched about discovering a new color! I call it ‘The Jackie.”

Once “The Jackie” dried, we wanted to give it some pattern. So I tried my best to lay out some blue paint tape to the background of the wood. To be honest, it’s very very hard to make straight lines free hand. But to be more honest, I like the character and imperfect-ness of all my pieces, so I’ll allow it.

We wanted to make this pattern bold. So we chose gold. The problem was that I didn’t have gold paint BUT I did have spray paint. So we risked two small paint brushes, sprayed the brushes with the paint, and tried our best to paint in the lines. Once that was done.. we threw out the brushes 🙂

And finally our paint project was finished! This gem holds a special place in my heart because not only did I get the chance to give a new life to an old piece, but I got to do it with a close friend.

Instagram: @novo_designsco

Etsy: etsy.com/shop/NovoCo

EAT.

Who wouldn’t want a sign that tells you to do what you love? (EAT).

Materials used:

  • Rope
  • Screws
  • Hooks
  • Tin letters
  • An old piece of wood (in this case, a shingle and an old piece of wood)

FullSizeRender-4.jpg

During a flea market splurge, I scored these awesome tin letters! The man who makes these letters irons them on a washboard in order to get that cool curved look. I love all of the different colors mixed into the letters, so much character!

Another cool find that I stumbled upon at the market were some old cedar shingles. I’m not sure if I’ve mentioned these shingles before but holy cow, am I in love. I bought 10 shingles that were carefully removed from 1900’s house. Each of them faded with blue paint on top of beautifully weathered wood.

So here I am, trying to dream up how to combine these two gold mines. The shingles are too thin to stand on their own as a sign, so I knew that they needed some support. As a true believer in making old new again, I didn’t want to go and buy any fresh piece of wood. Silly, right? So as I’m on a jog (so athletic, I know).. I pass this old dresser that’s sitting on the curb. Then the next day I drive by that same curb and the dresser is still there! I take that as a sign and I pull over and take the dresser.

I get that thing home and I saw it into a bunch of weird shapes that kind of replicate rectangles. I then mounted the shingle onto one of those weird dresser pieces of wood with my electric drill and some screws. I tied the rope to some hooks on the sides. I then screwed in those 3 special letters: E A T.

instagram: @novo_designsco

Splattered in Gold

Don’t you wish everything could just be splattered in gold? During one of my flea market adventures, I discovered a pair of door knobs. Yes, splattered in gold. I’m not sure how the gold got there or why I was so lucky in this discovery.. but I was ready to give them a new life.

I walked miles and miles (hyperbole) at the flea market, trying to think of how I could use these knobs. And then I found a regular old wooden tray. BINGO! I decided to make a serving tray.

FullSizeRender.jpg

When I brought this project home, I originally was planning on putting some small tiles on the bottom of the tray. Then I quickly discovered.. tiles are really expensive!! So that was quickly deleted from my mental list.

I was then walking miles and miles (hyperbole ctd.) through Home Depot and stumbled upon a gold metal sheet. You know one of those sheets that covers old school heaters – that kind! I don’t know why that sheet clicked for me, but I decided I wanted to use this as the base of the tray instead! My golden knobs would have a golden friend.

The main obstacle with these piece was adding the knobs. I used my handy drill with the largest drill bit in the case and spent an incredibly long time getting the holes to be the exact right size for the knob handles. (Like a very hard time.)

I then cut the metal sheet just with a regular pair of scissors and nailed it into the base of the tray. And that’s that!

I love where this piece came from and what is has turned into today. I can picture someone using this tray to serve their best friends some beers and mixed drinks or someone using this tray to bring their loved one breakfast in bed. When I say this, I hope you’re picturing this image with a hint of gold 😉

Instagram: @novo_designsco

The Window Project

Ohh the window project! This has to be one of my biggest project transformations yet. At a flea market, I found an old broken window that was basically dangerous to touch. It only had 3 out of the 4 pieces of glass still in tact and the paint fell off even if you moved it ever so slightly. SWOON. I was ready to start.

FullSizeRender

The best part was smashing the pieces of glass 🙂 – what a thrill! Having a bad day? I suggest you go smash some glass. Once I cleaned up that mess, I started sanding down the wood. That process took all of 2 minutes considering the paint was already doing the job for me and falling off at the touch.

IMG_0527

I then spray painted the wood white and made sure to paint the little lock at the bottom gold. After that dried, I soon found out what my worse nightmare is. Installing screen into windows. I went to Home Depot with stars in my eyes loving the idea of how beautiful this window will be with SCREENS! 5 hours later I was pounding tiny nails into the window frame hitting my fingers every other time. 5 hours might be an exaggeration but it felt like an eternity. Recently I was gifted a staple gun and I had the epiphany that THAT would’ve helped my process go much smoother. Another rookie move pulled by this novice project flipper.

Once the screen was installed, I could’ve cried with relief. Then I took a much needed break. OH but we’re not done yet! The next day, I hung a rope at the top of the window for easy hanging and a cute touch. And finally, I drilled in 4 knobs onto the bottom of the window. I got these knobs for about 50 cents each and was so excited to add them in as an accent on the window. I measure twice and drilled in the knobs and marveled at my beautiful work. I texted a picture to my boyfriend who so kindly replied, “Are the knobs off centered?” Yep. Off centered. I took another look at that window with a pair of fresh eyes and kicked myself in the butt for not measuring three times. Off centered!

But when all is said and done, I love those off centered knobs. I love the screen that took hours to install and I love that chipped paint and jagged glass that used to inhabit in that old window. I love that new life that has been breathed into an old treasure and that’s the whole reason why I’m doing all of this. For that new life.

Instagram: @novo_designsco

Let the piece do the talking

Sometimes when you get a really really cool piece.. you just can’t mess with it. And luckily, I was able to find some pieces just like that!

FullSizeRender copy

All I had to do with these bad boys was drill some holes in the back for easy hanging and give them a good cleaning (boy, were they dirty).

FullSizeRender-2 copy

And then came the photo shoot! I went to Home Depot and bought a big pot of plants that were more expensive than the actual planters.. (whoops) but I couldn’t resist!

I then planted the huge flowers into the planters and immediately fell in love. I used those Command plastic hanging strips on my walls and hung these beauties right up there. They truly lit up my whole room and I am envious of the woman who bought these from me. I was SO close to keeping them to myself! I just love how worn and weathered these planters are – it tells such a story. These guys must have lived outside for years and endured a lot in the outdoors. They are some tough cookies. Their wrinkles and lines and stains speak volumes. I hope you’re listening.

Instagram: @novo_designsco

Etsy: www.etsy.com/shop/novoco

Rinse. Re-use. Repeat.

On to project number 2! This one was an easy flip, but equally exciting – an antique washbaord!

FullSizeRender

This old washboard is made of wood and metal and is in good condition. All I had to do with this guy was give it a good washing (the irony!), sand it down, add on some hanging hooks on the back, and then add some character with the word ‘WASH’ painted on.

I really love the way the writing came out and it was really quite simple. I printed out the letters on your regular piece of computer paper and just used white acrylic paint. I painted a bit outside of the lines and let the paint bleed through the paper a bit. Doing that gave the letters a bit more character, which of course I love.

FullSizeRender-1

Then, voila! my project was complete. I love this old washboard. To think that families long ago would wash each piece of clothing on this thing. And now we can marvel at its story and history on the walls of our bathroom and laundry room!

Enjoy this simple flip and make sure to check out my Etsy page for more info 🙂

Instagram: @novo_designsco

Etsy: https://www.etsy.com/shop/NovoCo


My first project: Rust in Peace

My first project was an easy pick, some old rusty decor window shutters! This was my first purchase at Brimfield Antique Show, so what better project to start with?

FullSizeRender-3

My living situation isn’t exactly DIY friendly. A one-bedroom apartment in Somerville, Massachusetts isn’t exactly sawdust and spray paint friendly. So instead, I ventured a few steps outside to my building’s parking lot (don’t tell my landlord!)

I spent the first hour sanding down the shutters trying to get them as smooth as possible. This process actually ending up being very soothing. I saw old chips of paint falling off from the past and really got to see the grain and weathering of the wood. In one of the shutters, I noticed a chunk of wood missing and all I could think about was how it got there. Did the original woodworker hit the side? Did a bug sit on their shoulder and scare them so bad that they’re carving knife slipped? No matter the story behind it, I love that sliver of missing wood.

FullSizeRender

After what felt like hours of sanding, I realized my first rookie mistake. I could’ve removed the iron rods in the center of the shutters and made the sanding process a whole of a lot easier. MAJOR eye roll.

Shaking off my first mistake, I kept on rolling with the punches. Time for spray paint! I laid down all my old paper bags and magazines I could find in my apartment so that I wouldn’t get paint on the pavement (again.. don’t tell!) Then the fun began. Giving myself about a foot of distance from the wood, I tried my best to evenly spray every inch of the shutters. I first spray painted the wood white and was having a grand old time. Still on the first shutter, my spray paint bottle stopped working. What the!? I texted my boyfriend’s dad trying not to sound like a complete dummy. “Hi um, do you happen to know how do you fix a spray paint nozzle?” He gave me about 5 options on how to to clear the nozzle but I just couldn’t figure it out. Second rookie mistake. Back to the store for 2 more cans (just in case). And thank goodness I got 2 because the second can also broke! My pointer finger must be Hercules putting too much pressure on the nozzle. Thank God for those finger exercises! Onto the third can (which I handled with care) and finally spray painting the wood was complete.

IMG_0477

I spray painted the iron inserts gold to add a pop of color. As I did, I noticed a small tag on them labeled ‘Mexico’. AMAZING! The story of these shutters builds and they now have an original home.

I left a note next to the shutters praying that no one would take them as they dried. And my friendly neighbors obliged! Nice and dry, I put the shutters back together and voila! A new life has been ignited into these pieces.

My goal is never to cover up the history of these old treasures but just to enhance them. I want everyone else to see their potential and their story. To see them as treasures.

Find them at https://www.etsy.com/shop/NovoCo

IMG_048154

Before-and-Afters

Ever since I can remember, I’ve been obsessed with before-and-afters. I’d go over to my friends houses when I was growing up and organize their closets. I’d love seeing clothes on the floor one hour to color coordinated shirts hanging neatly. Not kidding. Color coordinated. To the rainbow.

As a teenager, I’d actually tune in when Proactiv commercials came on so that I could see those pimply cheeks turn clear ..in just 2 weeks! I subscribed to Proactiv for about 7 years patiently waiting on my ‘after.’

And then reality television got big. What Not to Wear? Hooked. Queer Eye for the Straight Guy? #1 Fan. I even loved when the Today Show chose one lucky lady in the crowd for a makeover. Swoon.

Don’t get me started on Extreme Makeover: Weight Loss Edition. Two hours of total transformation. The before-and-afters just kept coming and coming, what a dream! I was inspired enough to make my own fitness account on Social Media and tried my best to document all my befores just so I could work towards my afters. This phase didn’t exactly last long considering my body shape hasn’t changed much since I was like 18. And Oreos.

And then came Fixer Upper and boy, did I fall in love. If you look in the dictionary, Chip and Joanna Gaines’ photo should be next to ‘before-and-after.’ They are my inspiration for all things repurposed (me and millions of others, I know I’m not original on this one).

So where do I go from here? A clean-freak-Oreo-lover dreaming of clear skin, great fashion, and my very own fixer upper one day.

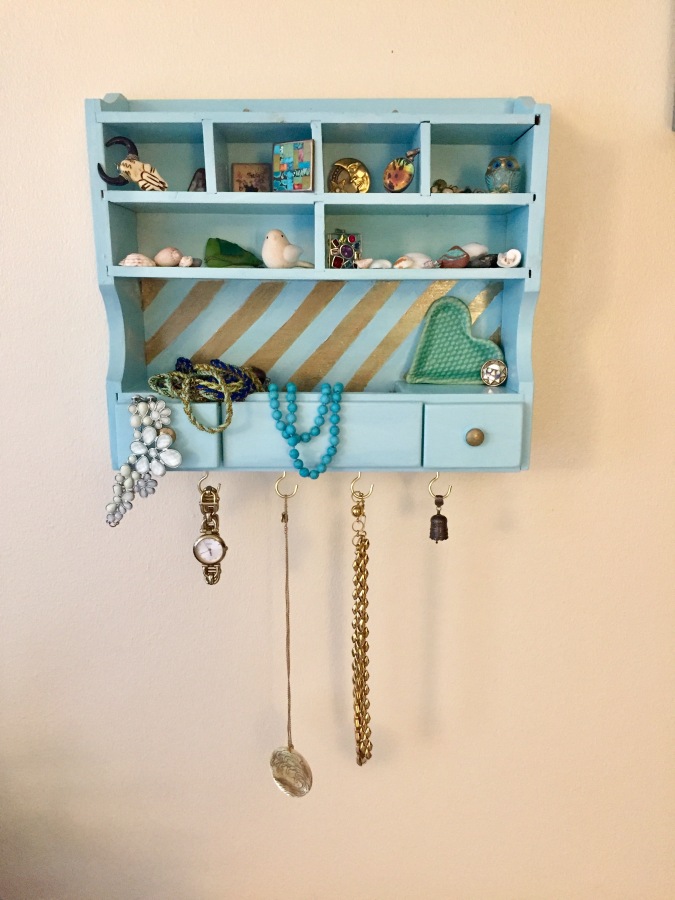
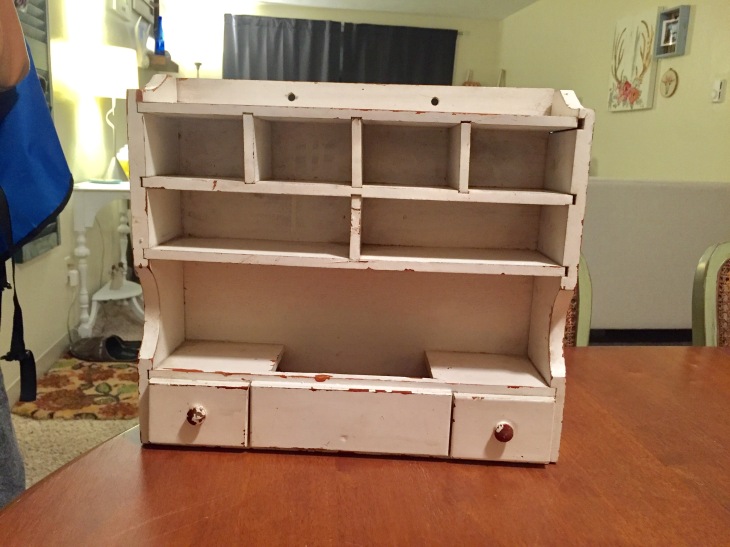
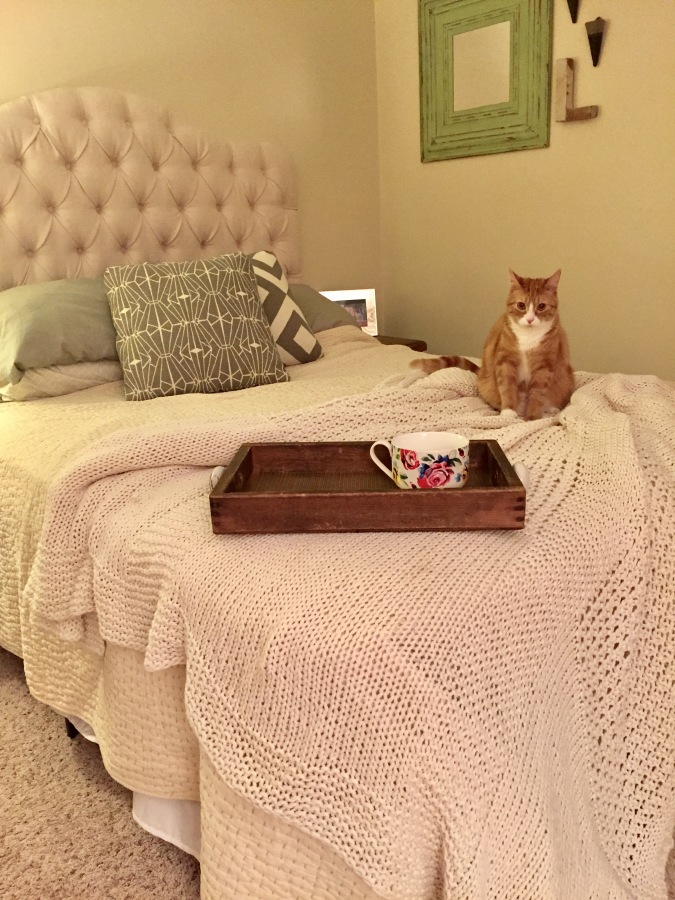
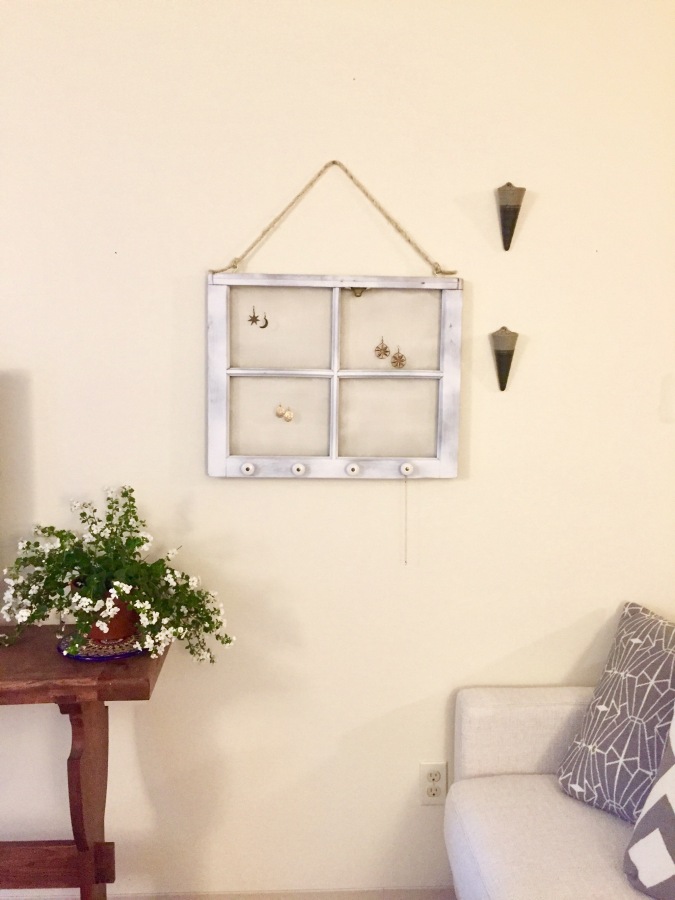
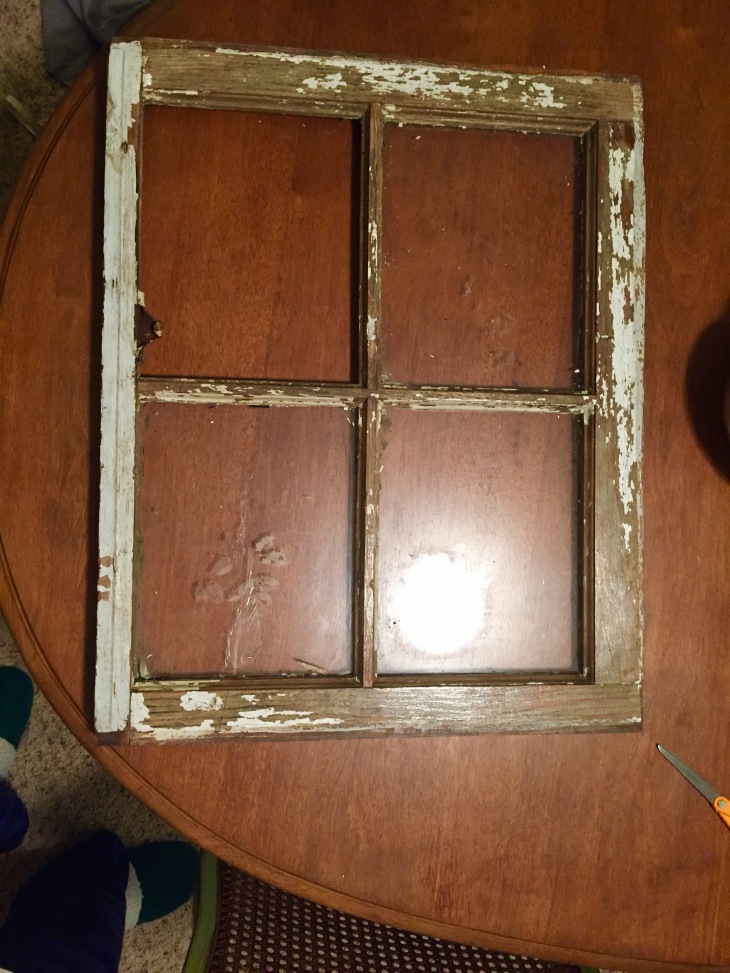
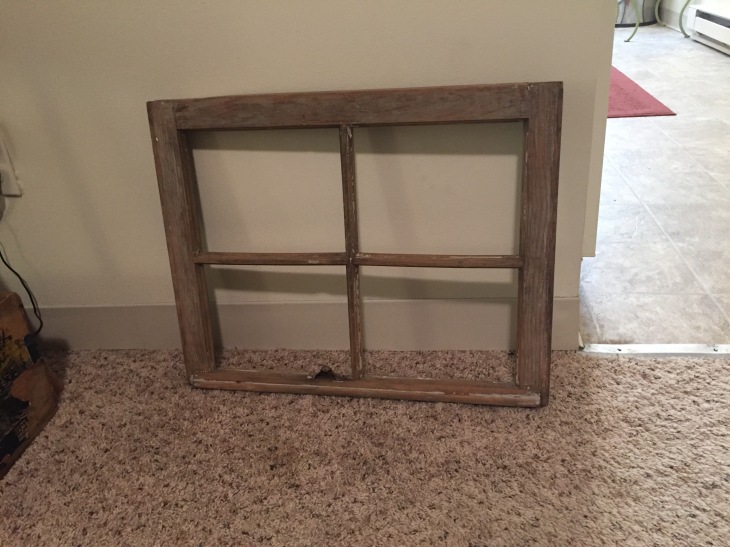
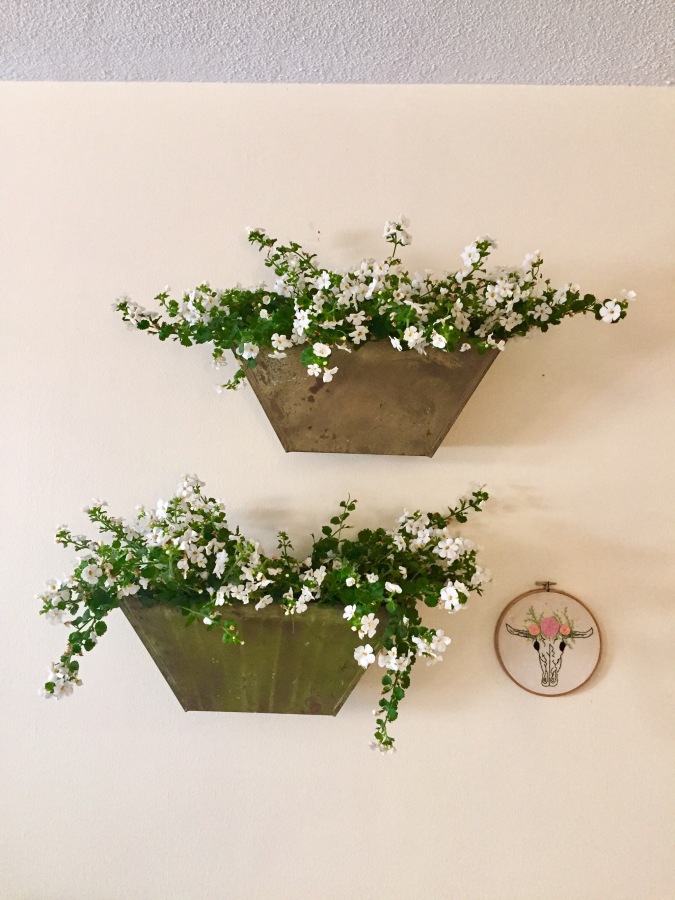
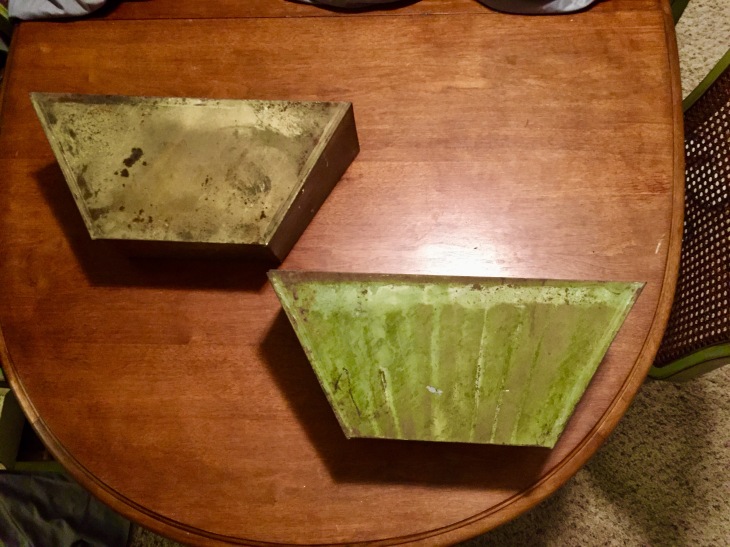
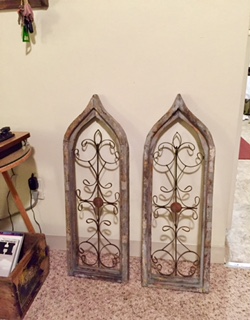
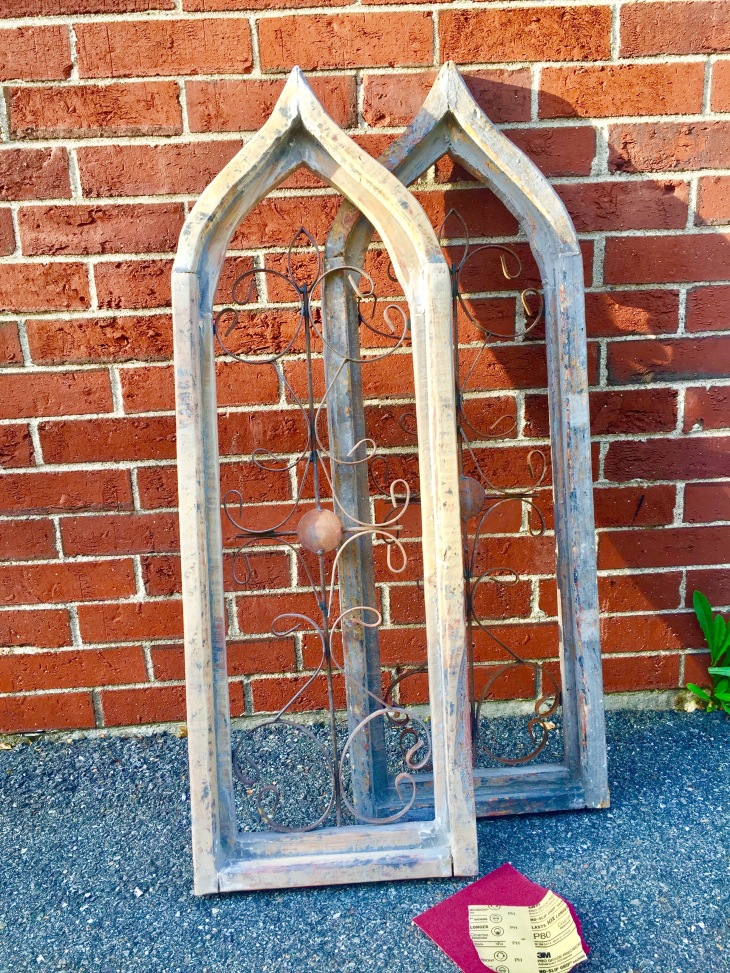
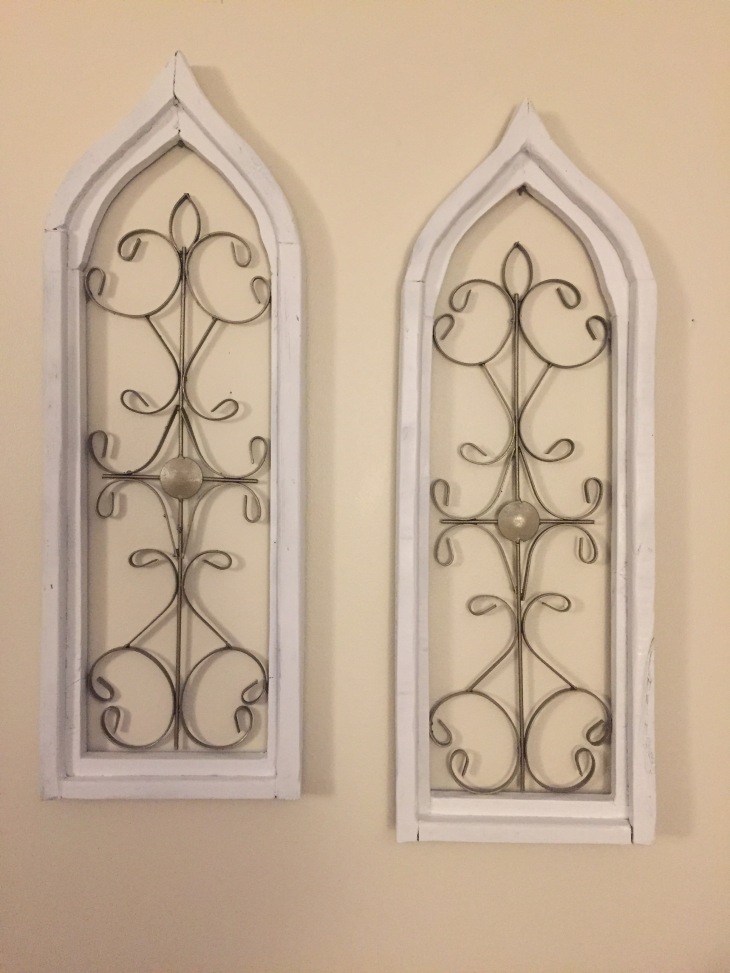
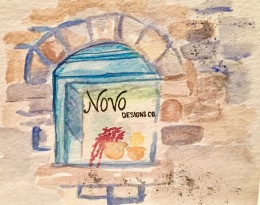
For the past few years, I’ve always loved going to different flea markets and antique stores looking for old treasures that need some love. The story behind the pieces is truly beautiful to me. Stories that deserve to be told and to be cherished. After the years, my walls have now been filled with these ‘stories’ but I haven’t wanted to stop reading and recreating them. That and my idle hands began to be only useful for being the mayor of ‘Chapville’ in SimCity after my boyfriend gifted me a tablet for Christmas. But responsible mayors must have other duties. Thus, Novo Designs Co. was born.

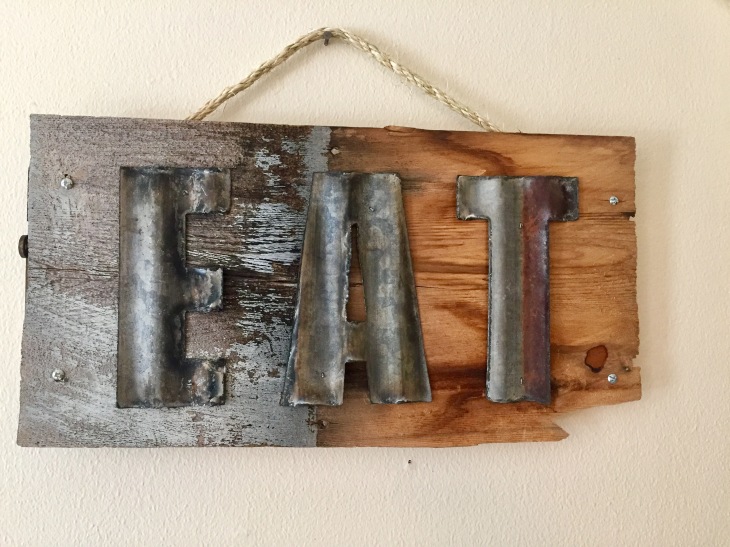
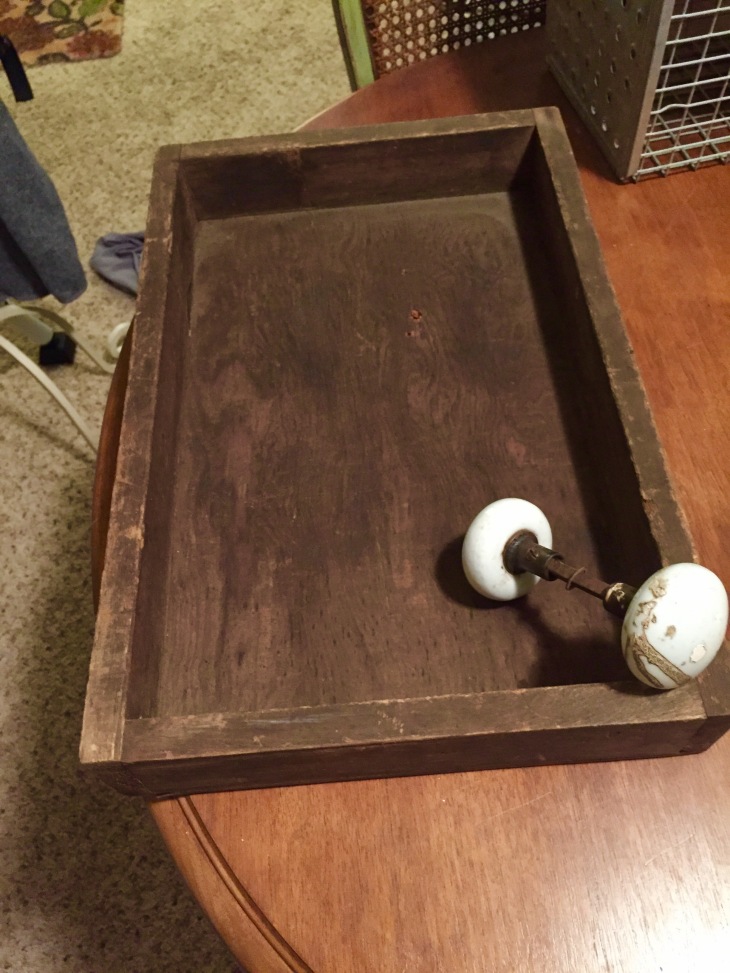
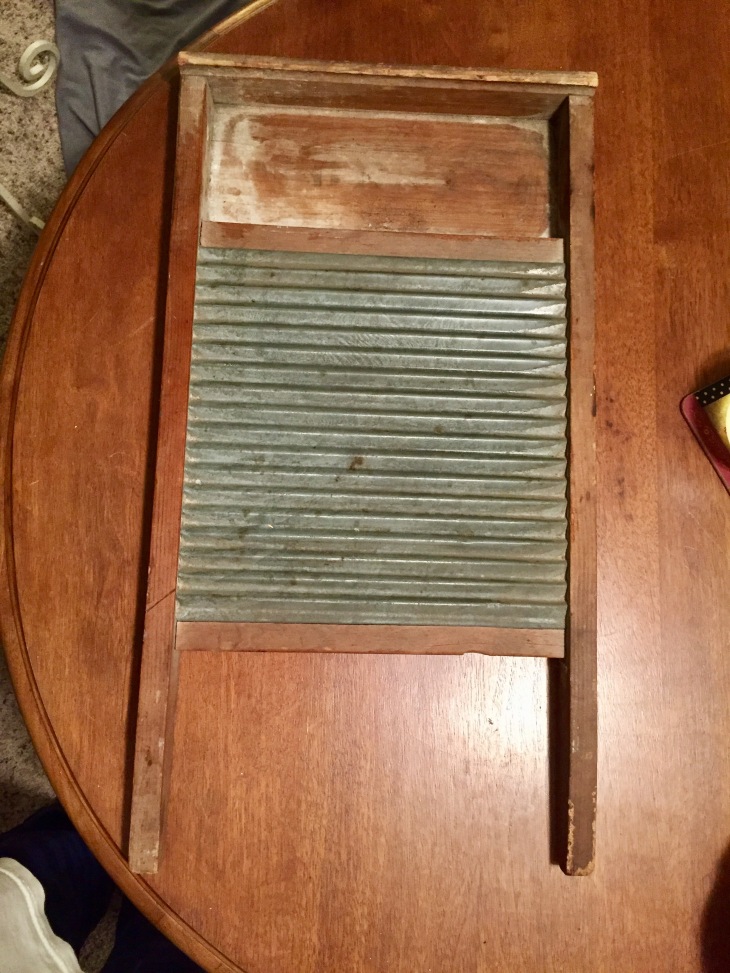
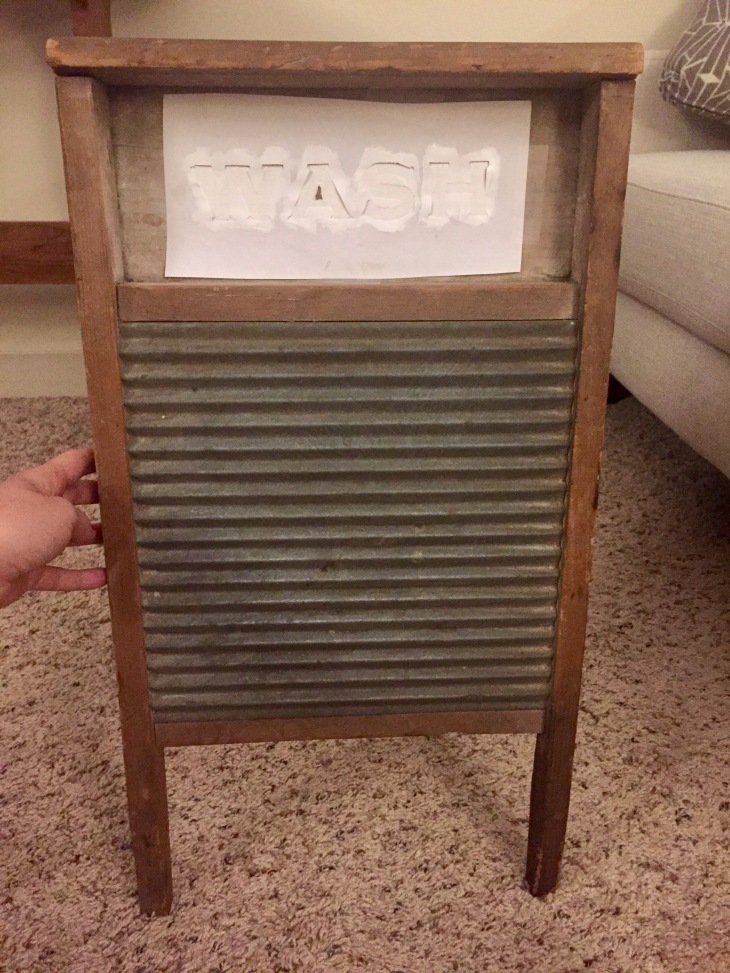
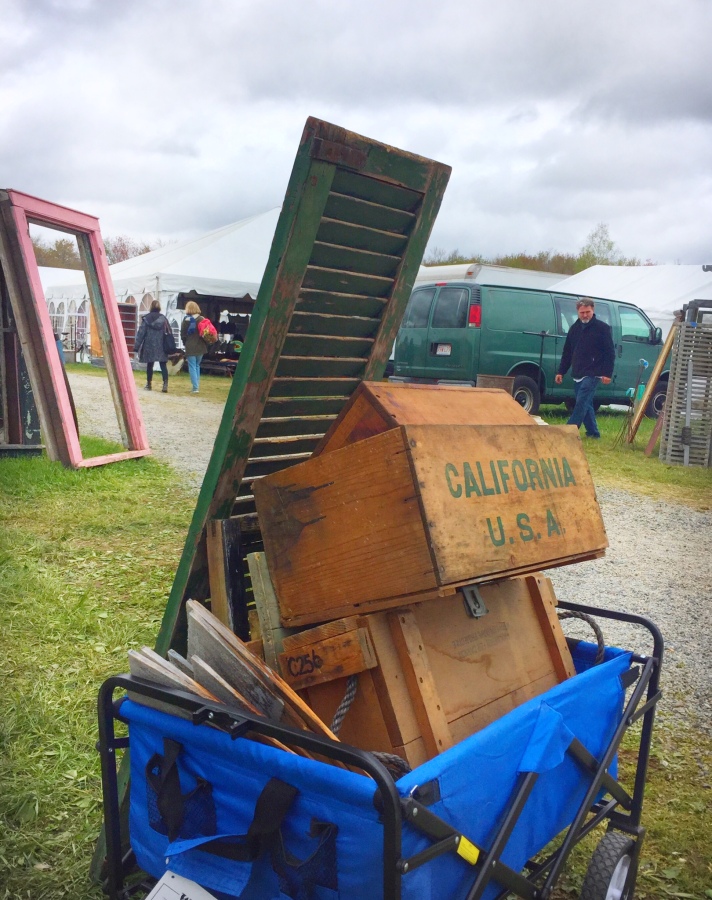
First came inventory and man, was I excited. My friend Jess and I ventured to the Brimfield Antique Show and didn’t leave for 6 hours. She bought a wagon just a few days before for the occasion and thank goodness she did because we had that thing filled within the first hour. We came up for air halfway into our treasure hunt and looked in our wagon to see a pile of wood. So much wood! And I was smiling from ear to ear. By the end of the day, I had a shutter under one arm and a ladder under the other as Jess wheeled our wagon in front of me. It may have been the best day of the year.

I probably haven’t met most of you reading this and I may never meet you. But we’re about to get personal. I came home later that day and hauled my loot into the apartment. I sat down and I looked at my pile of junk. And then I cried like a baby.

I thought about my ‘before’, my dreams and my idle hands. In that moment, I was my ‘after.’